Sausage & Kale Soup

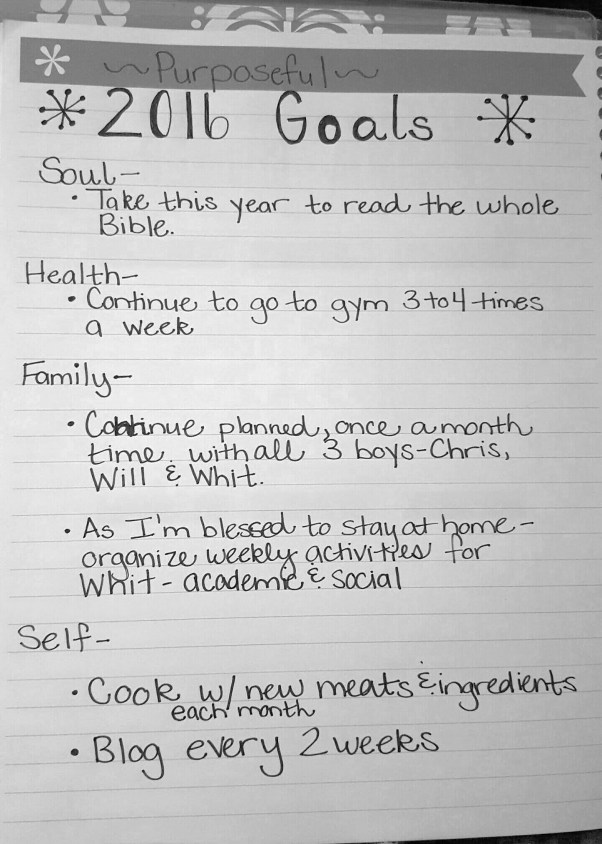
Happy NEW Year! A new year brings such excitement, promise, and new adventures. Each year I take time to review my goals from the year before and create new goals to guide me. This year I went through a process to find a word that encompasses my goals. My word this year is PURPOSEFUL. One of my goals is being purposeful with my blog. I want to share my recipes, my heart, and encourage you along the way. My goal is to blog at least every two weeks. So I’m a little off to begin the year. I give myself forgiveness and know that I have been purposeful in other aspects of my life: spending every moment soaking up time with my sister and niece while they were visiting, taking care of little one with pneumonia, adjusting back to an alarm and school routine, and threw in a few dates and a getaway with Chris.

20160103_212856

I wanted to start this year by sharing this yummy soup my sister, Lesley, shared with me. This year I rang in the new year surrounded by friends and my family. My sister and niece joined us for the celebration all the way from Texas. The following week, Lesley and I shared a lot of time in the kitchen. Our new, improved, and beautiful kitchen creates great space for sharing life. We are there all the time. This Sausage Kale Soup was shared and enjoyed on a cold, relaxing evening. It has instantly become a favorite. Not only was it yummy for dinner but I enjoyed it for lunch the following two days. Lesley says that it is just as terrific if you make ahead, freeze, and serve later. Plus it has KALE!! I can’t get enough of that green stuff. This soup screams to be made for a family with a new baby, a friend who has had a bad day, or just a simple “thinking of you” meal. Bless those around you this year. Look for reasons to Sing and Dance in your kitchen.
Looking Forward- Amanda

20160109_201427~2-2

Complete Happiness in a Bowl

Sausage Kale Soup

1 T olive oil
1 large onion, diced
3 garlic cloves, minced
2 lb Italian sausage, remove casting
1 lb red potatoes, sliced thin circles
1 bunch kale, trimmed, chopped, stems removed
8 cups of chicken broth
1 c dry white wine
1 t crushed red pepper (use less if you don’t want it too spicy)
1/3 c heavy cream
3/4 shredded parmesan cheese
salt and pepper to taste

Heat a large saucepan over medium heat. Add olive oil, onions, and garlic. Sauté for 2-3 minutes. Then add the sausage. Brown sausage and crumble into smaller pieces. Once the sausage is ready, add potatoes, kale, chicken broth, wine and crushed red pepper. Bring to a boil. Stir completely then reduce heat and simmer for 15 to 20 minutes. When ready to serve, stir in the cream and parmesan cheese. Serve in individual bowls topped with parmesan cheese and red pepper. Delicious with warm bread.

Chocolate Bourbon Pecan Pie

We are in the final days preparing for a fun and busy day in the kitchen.  I LOVE Thanksgiving!  I remember the smells of Thanksgiving waking me up as a little girl and being so excited about a day with family and yummy food.

I wanted to share a yummy pie that you might want to add to your dessert bar.  It’s gooey and full of rich favor!  Enjoy!  -Amanda

20151115_193920~2

Chocolate Bourbon Pecan Pie

1 uncooked pie crust (either store bought or make your own)
1 1/2 cup pecans, chopped
3 eggs, lightly beaten
1/2 cup sugar
1/2 cup light brown sugar
1 cup light Karo Syrup
1 T Bourbon (I used Willett)
1 cup semi sweet chocolate chips

Preheat oven to 325 degrees.
Place your prepared pie crust in your favorite pie dish.

In your mixer, beat your eggs, sugar, brown sugar, Karo Syrup and bourbon.  Stir in your pecans and chocolate chips. Pour pecan mixture into your prepared pie plate and bake 50 to 60 minutes or until the crust is lightly brown and the center is pretty set.

Remove the pie from oven and allow to cool at least an hour. Slice and serve. Top with a little bourbon infused whipped cream or vanilla ice cream. If serving the next day, you need to refrigerate. In my opinion, let pie come to room temp before serving.

We Just Keep Singing and Dancing…

Things have changed in our kitchen.  A sadness has been in our lives for over a month and we are not seeing the light just yet.  When we moved to Atlanta, we found the perfect home, in the perfect neighborhood, by the perfect schools, etc.  We did not find the perfect kitchen.  The kitchen is fine!  It is not set up for the cooking I enjoy.  Counter space, moving space, dancing space… it was not happening.  We started working with a designer, that took our little ideas and big dreams, and made it come to life on paper.  Chris and I “lived” in that paper floor plan for weeks, well months, trying to figure out if this is really what we wanted to do or just keep it the way it was (ugh!).

Enter in our contractor, electricians, plumbers, painters, carpenters, floor guys, stone layers, welders, and guys that can just rip stuff up.  One day I was singing and dancing, creating my last meal in my 1990’s kitchen and the next morning I was taking a sledgehammer to the floors.  (seriously, I was the first person who got to the tell this kitchen “bye-bye!”)

Collage 2015-09-04 21_25_52

It has been an exciting experience to see new walls go up, flooring change, and seeing the new kitchen, MY KITCHEN, start to show its face.  There have been challenges.  We have built several houses and been a part of the kitchen selections but never to this degree.  Seriously.  EVERY. DECISION. IS. OURS. TO. MAKE.  That can be fun and exciting and at the same time very stressful, exhausting, and time-consuming.  Some decisions are easy.  Yes, we want a pantry.  Why would you build a house without a panty? Oh wait, this is a new thing for this house.  I can keep my love/hate relationship alive with Costco.  Some decisions I leave all up to Chris.  He has a good eye for design and can visualize the whole picture.  (this is not me!) I need visuals, manuals, examples, and many times I need to “play” with it! So the day we went to look at all the appliances, I was overwhelmed but in complete bliss.
Every oven/stove top was right before my eyes. Wolf, Viking, GE, blah, blah, blah. Chris put up with me pretending to cook, opening the refrigerator, and dashing over to the sink to plop the turkey in it… Well, you get the idea.
And now here we are! Over one month, we have not had a real kitchen. Our makeshift kitchen (in the basement) has a sink, mini fridge, microwave, and a slow cooker.
At first it was fun, now I’m over it!! We are all over it. Will just wants me to make cookies. I just want to try out a list of new recipes. It will all be worth it. There is a glimmer of light!
So we are still singing and dancing! I mean we have an almost ten-year old, we are Whipping and Naeing Naeing like everyone else. We talk about the first meal that will be cooked in the kitchen. We talk about how we can’t wait to have guests over again. We talk about all the life and love that will happen right there in our kitchen. Soon and very soon. Until then, keep singing and dancing and creating new things. I’ll be sharing my new slow cooker recipes soon.
Looking Forward,
Amanda

Boys in the Kitchen- Fortune Cookies

It’s important to me that my boys know their way around the kitchen. They don’t have to be culinary experts (but a mommy can wish). I just want them to be intelligent in a kitchen and around a table. I want them to appreciate the whole experience. I never pressure our oldest in the kitchen. Instead I introduce concepts and ask for his opinions. Naturally he has taken an interest in some aspects of cooking and baking. I love to celebrate and can always find a reason to cook.

With Chinese New Year’s coming, I thought it would be fun to make fortune cookies. I wanted it to be simple. We did not create gourmet cookies. Instead we had fun creating fortunes to hide inside the cookies and spent time learning a few new tricks. This was W’s first time to drizzle chocolate. He was a natural. And he learned a very important rule: Never Waste Chocolate! We took the remaining chocolate and made chocolate covered pretzels.

Let’s be honest. These fortune cookies are made from pie crust. Nothing culinary about it. Instead it is about taking time to be with your kids in the kitchen and making a few memories. They will find pride in creating something and feel loved that you spent time with them. And you might create a love for the kitchen at the same time.
Take time to make the memories! -Amanda

Kid Friendly Fortune Cookies

IMG_7230

Refrigerated pie crust or homemade pie crust
Melting chocolate for drizzle

First start by preparing personalized fortunes.  Cut strips of paper (2 inches long by 1/2 inch high). We used a thin Sharpie marker to write our messages. You could print your messages using a computer. Double fold all your messages. They need to be little to fit into the cookie.

Unroll pie crust. Using a cookie cutter to cut out circles (about 2-1/4 inches in diameter). Space very closely to get all on one crust. Take the scraps of dough and reroll to make more circles. We got 15 circles out of our one pie crust. Take a pie crust circle and place a folded fortune strip in the center. Fold circle in half with fortune inside, and pinch edges (not center) to seal. Place on cookie sheet covered with parchment paper. Repeat for remaining circles.

Bake cookies at 450 degrees for 7 minutes or until golden brown. Remove from cookie sheet to cooling rack and allow to cool completely.

Melt your selected chocolate in the microwave according to package directions. Remove and stir. Stir until chocolate is smooth. Drizzle chocolate over cookies, or dip edge of cookie into chocolate. Decorate with sprinkles if desired. Allow chocolate to harden completely before serving.

Creamy Blanco Queso

The countdown is on to the Super Bowl. I wanted to share another yummy appetizer to share at your party. Change it up a little with Blanco Queso. Yummy and you can spice it up with jalapeños. Serve it up with a side of salsa or guacamole.   Everyone loves to munch during the game!  If you still have friends keeping to their New Year’s goals, consider serving up Cauliflower Poppers or Zucchini Fries. Enjoy creating your Super Bowl menu! -Amanda

IMG_6822

Creamy Blanco Queso

8 oz block regular cream cheese, cut into 1/2 inch cubes
1 lb. Monterey Jack cheese, cut into 1/2 inch cubes
1 T salted butter 1 (4oz can) green chiles
1 T jalapeños, minced fine (optional)
4-6 T milk
3 Tablespoons water

In a crockpot combine the cream cheese, Monterey Jack cheese, butter, green chiles and jalapeños. Cook on high for 30 minutes. Stir the mixture until well combined and then add a Tablespoon of milk and water at a time until you reach the desired consistency. (this is all up to you on consistency!) Cook for another 15-20 minutes, or until the cheese is completely melted and combined.
Keep cheese dip in the crockpot on the warm setting until ready to serve. Check on it and occasionally stir throughout the serving. Serve with tortilla chips or warm tortilla.

Layered Mexican Dip

Superbowl is this week!  Whether you are cheering for The Seahawks or The “Ball Deflated” Patriots, (or just excited about the commercials and halftime!), everyone wants something fun to munch on.  I will share a few of my “party dips” and highlight some recipes from the past. My Layered Mexican Dip has evolved over the years.  I started with a simple 5 layers and just kept adding stuff.  There is no right or wrong to this recipe.  Delete or add any ingredients that fit your tastes.  Just have good tortilla chips!    -Amanda

IMG_6798Layered Mexican Dip

1 (16oz) can refried beans
2 T taco seasoning
1 cup Guacamole or pre-made avocado dip (6 oz) carton
1 (4.5 oz) can chopped green chiles, undrained
1 (8 oz) carton sour cream
2 tomatoes, diced
1 small onion, finely chopped
1/2 cup shredded Monterey Jack or Cheddar Cheese
1 (4 1/4 oz) can sliced ripe olives, drained

Combine beans and taco seasoning mix.  Spread in a deep dish pie plate or casserole dish.  Layer dip and remaining ingredients in order listed.  I make this dip ahead and refrigerate until party time.  Serve with tortilla chips.

Tex-Mex Tortilla Soup

It’s not cold in ATL today but in my Texas hometown, they are welcoming lots of snow. Snow and cold weather makes me want soup. Here’s a little Tex-Mex Tortilla Soup I made a few weeks ago. You probably have most items on hand already. This soup was different from my go-to Tortilla Soup because of the yummy rice and black beans. Everyone needs options! Enjoy and stay warm! -Amanda

IMG_6925

Tex-Mex Tortilla Soup

3 T olive oil, divided
coarse salt and fresh black pepper
1 lb. boneless chicken breasts, cut into small cubes
1 small white onion, diced
1 green bell pepper, diced
1/2 cup black olives, finely chopped
3 cloves garlic, minced
1 + 1/2 t chile powder
1 t dried Mexican oregano
1/2 t dried thyme
15 oz canned black beans, drained
1/2 cup uncooked long or medium-grain brown rice, rinsed well in a wire strainer with cold water
5 cups low-sodium chicken broth
1 cup salsa
Optional Toppings:
sliced avocados
shredded Monterey Jack cheese
sour cream
tortilla chips

In a large soup pan, heat 1 T of oil over medium heat. Season chicken pieces with salt and pepper. Add chicken to pan, stirring often so all sides get browned. Remove and set aside.
Add 2 T of oil to a soup pot over medium-low heat. Sauté the onion, pepper, garlic, and olives together for 5 minutes. Add a little pepper and stir often. Mix in the chile powder, oregano, thyme, black beans, and rice, cook 3 minutes. Stir the chicken back into the pot and add the broth and salsa. Bring to a simmer and cook 30 minutes. Stir often. Add seasonings to taste. (OR add to crock pot and keep on low until ready to dinner.)
Serve with toppings like, cheese, sour cream, sliced avocado, and tortilla chips if desired.

Red Velvet White Chocolate Chips Cookies

On the mission to make several new treats this holiday season, this was a new one I attempted. Now, have you ever skipped a few steps in baking. It is usually not a wise decision. This recipes begins with a cake mix. I was not sure I was sold on this but it worked. I adapted the recipe a little to make it work for me. But you will see from my notes below that I would definitely create a different drizzle next time. The cookies were good but did not give me that total red velvet taste I love. I think the cream cheese drizzle would take care of that. If you make that change to the recipe, let me know! (and send a picture.) I also update this recipe once I do too. Enjoy the wonderful smells in your kitchen this season. 
Merry Christmas! -Amanda
                                                             

IMG_6578

                                  Red Velvet White Chocolate Chips Cookies

1 box Red Velvet cake mix (I used Duncan Hines)
1 t baking powder
2 large eggs
1/3 cup + 2 T vegetable oil
1 t vanilla extract
1 cup white chocolate chips (use another 1/2 cup to press in before baking)
1/2 cup powdered sugar
1/4 lb white almond bark

Preheat oven to 350 degrees. Line a large baking sheet with parchment paper. Set aside.
Using a mixer, mix together the cake mix and baking powder. In a smaller bowl, whisk the eggs, oil, and vanilla together. Add the egg mixture to the cake mixture and stir to form a dough. This is the tricky part, you must make sure all the cake mix is dissolved and there are no “dry pockets.” The dough will be oily. Gently fold in the chocolate chips.
Drop 9 rounded balls of dough, about 1 1/2 T of dough each, onto prepared baking sheet. Press in a a few more white chocolate chips on top of the cookie dough balls. This is completely for presentation. 
Bake each batch for 9 minutes. Remove from the oven and sprinkle each cookie with confectioners’ sugar. Allow to cool completely on baking sheet for 5 minutes. Transfer to a wire rack to cool completely.
Melt almond bark in microwave. Stirring every 30 seconds until completely melted. Drizzle melted almond bark over cookies. Allow to dry.

**Now- the next time I make these cookies, I will make a cream cheese drizzle for the cookies.
Something like this:
4 ounces cream cheese, room temperature
1/2 cup powdered sugar
1 t vanilla extract
3 to 4 T milk
Beat cream cheese until very creamy. Beat in powdered sugar. Stir in vanilla. Add 3 tablespoons milk. Totally combine. Add more milk to get desired consistency for drizzling.

Texas Sheet Cake Cookies

Hello December! There is something about this month that makes me think I need to bake every day! I’m a realist with an active eight month old and nine year old so I have set the goal of at least 5 new baking recipes this season. You know those recipes you have set aside all year or torn out of magazine, that is the ones I’m after. I have a limited amount of time for baking (basically during nap time) and I will be sharing what I have learned.

This little cookie has snuck into our house and is crazy insane IF you love chocolate and fudge. Being from Texas, our sheet cake shows up at lots of get togethers. So I wanted to make a cookie inspired by this famous cake. After combining four different recipes, I think I found something that works. My son and I are fudge lovers. So the icing on these cookies gave us complete happiness. See what you think! If you have a cookie, candy, or treat recipe that you are dying to try- send it my way. I’m feeling crazy! As you are cooking, baking, decorating, wrapping, etc.- don’t get so overwhelmed or crazy that you forget what this whole season is about.
Singing and Dancing to Sufjan Stevens!- Amanda

FullSizeRender-3

Texas Sheet Cake Cookies

½ cup butter, room temperature
⅓ cup granulated sugar
1 egg
1 t vanilla
1 t baking powder
½ t salt
1⅓ cup flour
½ cup semi-sweet chocolate chips, melted

Icing
½ cup butter
2 T cocoa powder
3 T milk
2½ cups powdered sugar
1/2 cup pecans, finely chopped

Line baking sheet with parchment paper. Using a mixer, beat butter and sugar together until light, scrape sides frequently. Add egg and vanilla. Continue mixing until well blended. Mix in baking powder and salt. Turn mixer to low and slowly add in flour. Dough will be thick. In the microwave, heat chocolate chips on high in 30 second increments until melted, stirring after every 30 seconds. Mix melted chocolate directly into cookie dough until evenly mixed. Drop dough by a tablespoon sized mounds onto baking sheet. Bake at 350 degrees for 7-8 minutes until cookies appear set. They will still be very soft on the inside. You do not want to over bake. Trust me. Place the cookies on a wire rack to cool.
Now let’s make the icing- In a medium saucepan combine butter, cocoa powder and milk over medium heat. Continue to whisk until all is melted together. Remove from heat and whisk in powdered sugar. Finally add the pecans. Pour icing over cookies and allow icing to set before serving. Seriously let these cookies just take a bath in the chocolate goodness. Once cooled, prepare yourself. Then store the cookies in an airtight container for up to 3 days.

Look at those cookies taking a warm, chocolate bath!

Look at those cookies taking a warm, chocolate bath!

Basic Breakfast Biscuits

Breakfast for Dinner! It’s a requested meal in our home. Our oldest loves breakfast. Mostly he loves bacon and biscuits. Last night I decided to make some basic biscuits. To be honest, this is the first time I tried to make biscuits. There are lots of recipes out there but I experimented with this one. It was a winner last night complete with butter and cherry jam. (Trader Joe’s Cherry Preserves is a game changer!)

IMG_6313

Basic Breakfast Biscuits

1 stick of butter
2 cups all purpose flour
3 t baking powder
2 t sugar
½ t salt
¾ cup milk

Preheat your oven to 450 degrees. Add flour, baking powder, sugar, and salt into a mixing bowl. Mix all the ingredients together, and then add the stick of butter. Using a pastry blender, cut up the butter into the dry ingredients. Keep cutting the butter until you don’t have any pieces bigger than a small pea. Add in milk. Using a fork, stir the mixture until all of the dry ingredients are absorbed by the milk.  Don’t overdue the stirring.

Next, sprinkle some flour out on your counter. Put the dough on the floured surface.Then knead the dough. To knead, fold it in half, press it down, and turn the dough a quarter turn. Then fold again, press down and turn. Do this several times. I learned this is how the flaky layers are formed. When you’re done with the kneading, flatten the dough out with your hands into a thickness of about ½ inch. Using a biscuit cutter, cut the biscuits out of the dough. If your cutter is sticking to the dough, dip it in some flour in between each cutting.  Place the biscuits on a lined metal cookie sheet.Take the remaining dough, and form it into a ball, knead it a couple times, flatten it out, and cut more biscuits. Put the pan in the refrigerator for 10 minutes, before you put it in the oven.  After 10 minutes, take the pan out and put it in the oven.  Bake for 10-12 minutes or until a beautiful golden brown. Remove the pan from the oven, and immediately remove the biscuits from the pan. Immediately brush with melted butter.  Serve warm.

FullSizeRender-2

We are loving this jar of goodness!